Week Twenty: Catapults
Leave a commentOctober 11, 2015 by libraryheather

Program Title: Catapults
Target Age Range: Grades 4-6
Program Length: 90 minutes
Brief Description:
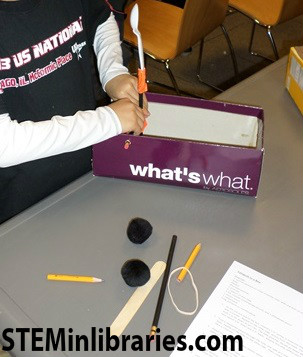
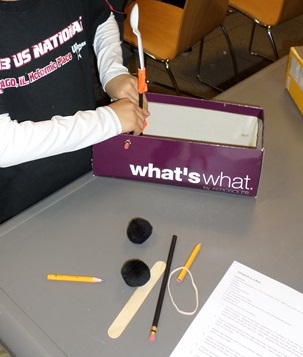
Explore the physics behind how catapults work, and make both a hand-held catapult and a catapult-in-a-box.
Supplies:
Craft sticks (9 per participant)
Rubber bands (7 per participant)
Plastic spoons (2 per participant)
Unsharpened pencils (3 per participant)
Sharpened pencils (1 per participant)
Duct tape (1 roll per table)
Single hole punchers (1-2 per table)
Rulers (1-2 per table)
Markers (1 per participant)
Push pins (1 per participant)
Narrow shoe boxes (narrow enough for a pencil to fit through both of the short sides), with one end cut out leaving a 1″ strip on the bottom (1 per participant)
1″ fuzzy pompoms or marshmallows (a few per participant)
A variety of large cardboard boxes
A variety of objects (such as plush toys) for catapult target practice
A computer connected to a projector with sound
Catapult in a Box Instructions
Cost: $0-50
Advanced Preparation:
-Several weeks in advance, ask fellow staff members to contribute narrow shoe boxes to the cause! Make sure to collect these all at least a week before the program, so that you have time to make the necessary modifications to the boxes.
-Cut out one short end from each shoe box, leaving a 1″ horizontal strip at the bottom.
-Collect a variety of cardboard boxes and seal them with packing tape.
-Practice making a handheld catapult several times and talking through the instructions aloud. It’s easiest to do this activity step-by-step as a group.
-Make a model of the box-style catapult.
-Test out both of your catapult models to get a feel for the best way to hold them (angle, etc) and the differences in the way they launch objects.
-Use masking tape to make distance lines and numbers on the floor, so that they can test how far their catapults can shoot. We had ~24 participants, so we made two lines so that more people could test simultaneously.
Program Outline:
1. Getting settled, welcome, introductions: 5 minutes
2. Topic introduction, two short videos* about catapults, science explanation/discussion: 15 minutes
3. Make handheld catapults as a group (walk them through the steps verbally): 10 minutes
4. Test small catapults for distance: 10 minutes
5. Make and test Catapult in a Box Instructions: 30 minutes
6. Have everyone assemble a fort and take turns trying to hit various objects with their box-style catapults: 20 minutes
*We watched 0:36-2:10 of The Catapult History, and all 2:44 of Mangonel Siege Artillery with Dan Snow.
Handouts:
Catapult in a Box Instructions
Special Instructions and Procedures:
Science Discussion:
After we watched 0:36-2:10 of The Catapult History, we said the following:
“If you guys are like me, you have no idea what 130 kilos and ‘over half a kilometer’ means. So, I looked it up for us. 130 kilos is 286 pounds, and half a kilometer is about a third of a mile. A third of a mile is about 1,585 feet, which is more than 5 football fields long! Just think: If the weight of the average 10 year old is 71 pounds, that means a torsion-powered medieval catapult had the potential to toss four of you over 5 football fields at one time! That’s a lot of power.”
We then explained how potential energy and kinetic energy related to our handheld catapult model. To further illustrate potential and kinetic energy (and see a real, medieval catapult!), we watched The Mangonel Siege Artillery video.
Make sure everyone knows the difference between a 90-degree and 45-degree angle. Explain that, for distance, being able to fire a catapult at a 45-degree angle is optimal.
Explain trajectory, gravity, and Newton’s First Law of Motion as it relates to projectile being released from the handheld catapult. There is a very good explanation of Newton’s First Law of Motion and catapults on The Science Behind the Catapult. Physics Classroom has a great explanation of gravity’s effect on an object’s trajectory.
Then, explain Newton’s Second Law of Motion and how it relates to why catapults were capable of firing very heavy objects long distances. There are good explanations at HandsOnWNC.org, Catapult Physics, and TeachEngineering.org. We used two concepts to help illustrate this: 1) If we used a ball of playdough the same size as our fuzzy pompom in our catapults, which would go further?, and 2) would it be easier to throw a baseball or a bowling ball 10 feet? The idea for the latter came from this most excellent video from Coursera (if you’re shaky on physics, this is a good, free course to educate yourself!). In order to throw heavier objects further/faster, you need to create more force (e.g. the tension and torsion used in medieval catapults).
We reiterated that when they’re building and using their catapults, they have to think about the tension of the rubber bands, the angle of the catapult, the angle at which the released arm of the catapult stops, and the weight of their projectile.
Of course, we also made sure to say that these are absolutely not to be used as weapons. That includes not pointing the catapult toward anyone’s face and not putting anything heavier or harder than a marshmallow in the catapult–EVER. Not now, not at home, not at school.
Resources Used:
Education.com: Marshmallow Catapult
Cosmos.bgsu.edu: Simple Machine Science: Marshmallow Catapult
YouTube: Mangonel Siege Artillery – Battle Castle with Dan Snow
Explorabox.org: Catapult Science
TeachEngineering.org: Catapults!
TeachEngineering.org: Hands-On Activity: Catapults!
Janicetobey.hubpages.com: Catapults! Models, History, Unit Study Activities, and Kits!
Yarmouth.K12.me: The Science Behind the Catapult
Real World Physics Problems: Catapult Physics
Physics Classroom: Characteristics of a Projectile’s Trajectory
A Child’s Gallery Hands On: Catapults & Physics Phun!
Catapult Physics: Newton’s Second Law
Coursera.org: How Differently Do Different Balls Fall?
Additional Resources:
Education Possible: Simple Science: Catapults and Trajectory
What we would do differently:
There’s nothing we would do differently–this program went really well. The only problem we encountered is that some 4th-6th graders have a lot of trouble manipulating rubber bands–particularly in Step 8 of the Box Catapult. There’s nothing to be done about this except to help them with it, but we wanted to give a heads up that this is likely something you will encounter.
Ultimately, the box-style catapult took longer than we expected, leaving us with about 5 minutes for testing the catapults. As a result, we set up the fort while they were finishing the project and had everyone shoot at the same time. It was still fun! Another idea we had was to set up two box forts and have the kids shoot pompoms back and forth over the forts.
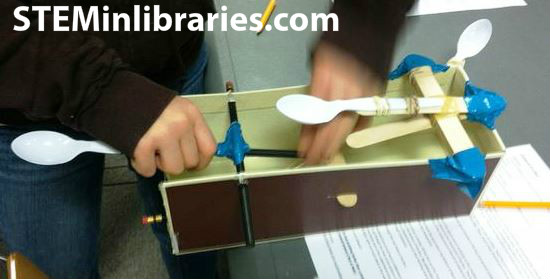
Of course, you may have someone who rigs up a switch-activated double-catapult.
Adaptation for older/younger audience:
We like these alternatives (or something like them) from Education Possible and Kids Activities Blog. However, we hesitate to recommend doing this activity as a program for younger children, because of the difficulty that older children have with rubber bands, as well as the complexity of the science behind catapults. For an older audience, though, there’s really no limit to how crazy a program you could do. Consider this: a catapult building/design/invention contest outdoors during the summer for teens!
