Week Forty: Plant Science
Leave a commentOctober 18, 2015 by WittyLibrarian
Program Title: Plant Science
Target Age Range: Tweens, Grades 4-6
Program Length: 90 minutes
Brief Description: Explore how plants grow and thrive in a variety of experiments.
Supplies:
Variety of leaves from trees, especially ones that are vibrantly colored
Glass jars or beakers (we used baby food jars)
Rubbing Alcohol
Bowls
Water
Coffee filters
Tape
Pencils
Latex gloves
Cotton balls
Seeds (we suggest pumpkin, lima, corn, pea, green bean, tomato, and marigold seeds)
At least two different types of soil
Vinegar
Baking soda
Distilled water
Paper cups
Spoons or stirring sticks (to use in pH level test to stir ingredients together)
Measure cups and spoons
Bendy straws
Plastic Wrap
Cut squares of cardboard
Thermometer
Desk lamp
Hot glue gun and glue
Cost: $$ 50-100
Advance Preparation:
- Cut out squares of cardboard. Ours were roughly 7×7 inches.
- Build a sample greenhouse, per instructions on Greenhouse Project on Education.com
- Gather soil samples, at least two varieties. Label each variety as Sample A, Sample B, etc. Fill small paper cups with sample of soil, and mark the cup with the appropriate label (A, B, etc.).
- Collect leaves from trees, preferably leaves in vibrant colors.
Program Outline:
 1.Welcome and Introduction.
2. Explanation of the parts of a pant and life-cycle of a plant. Molecular Expressions’ Plant Cell Structure article has a good explanation of the basic parts of a plant (see the last paragraph for information). Kean University Continuing Education’s Implementing the Science Standards K-4: Plant Life Cycle provides a nice explanation of the life cycle of a plant.
3. Explanation of photosynthesis. Photosynthesis: How Plants Make Food and Energy? on Easyscienceforkids.com and The U.S. Department of Education’s Office of Educational Research and Improvement: Programs for the Improvement of Practice’s Helping Your Child Learn Science’s Plants article are both good resources regarding photosynthesis.
4. Photosynthesis experiment, part 1
5. Have a discussion regarding whether plants need soil to live and grow. Wonder of the Day #262: Can Plants Grow Without Soil? on Wonderopolis.org and New Mexico State University: College of Agricultural, Consumer and Environmental Sciences’s Southwest Yard & Garden, December 14, 2002 issue’s Plants Without Soil article provide explanations on how plants can thrive without soil.
7. Photosynthesis experiment, part 2
8. Explanation of soil nutrients, soil testing and pH levels. North Carolina’s Department of Agriculture and Consumer Service’s Kids World’s Plant Nutrients article is a great resource for information on soil nutrients, North Carolina’s Department of Agriculture and Consumer Service’s Kids World’s Soil Testing article provides information regarding soil testing, and both Acid or Alkaline? What pH Means in Gardenspeak by Marion Owen on Plantea.com and pH Acid Alkaline Preferences of Plants by Pam Walatka on Lazycompost.com offer helpful information regarding pH levels.
9. pH levels in soil experiment
10. Use tested soil to plant appropriate seeds.
11.Set up greenhouse demonstration.
12. Explanation of how greenhouses work. How Greenhouses Work by Sara Elliott on Howstuffworks.com provides a thorough explanation on greenhouses.
13. Build greenhouses.
14. Optional: Explanation of plant cells and parts. Molecular Expressions’ Plant Cell Structure is an excellent resource for plant cells and parts.
15. Optional: Plant cell coloring sheet
Procedure:
We followed the experiment listed under the heading of Photosynthesis and Pigments in Photosynthesis Experiments for Kids by Kevin Wandrei, Demand Media on SeatlePi.com. We divided the experiment in half, having the kids first tear up the leaves and soak them, and after waiting about a half an hour, did the second half with the coffee filter strips. We used baby food jars instead of beakers, and used large containers filled with warm water set in the back of the room to soak the jars in until the second step. We do not recommend doing as we did with the large containers filled with water, and suggest instead that each jar sit in an individual small bowl filled with warm water. Many of the jars tipped and spilled with our original method.
We did the experiment as outlined in Free Farm Lesson Plans: Garden in a Glove on Zweberfarms.com. For seeds, we chose to use pumpkin seeds, green beans, lima beans, peas, and corn.
We used the baking soda and vinegar method outlined in Testing Your Soil pH Without a Kit on Preparednessmama.com. To vary results, we purchased two different brands of soil, one that was nutrient rich and one that was just plain topsoil. Each participant was given a random small paper cup of soil to test. We labeled each cup as either A or B, with A being the nutrient rich soil and B being plain top soil. This way, when it came time to plant seeds, participants would know which soil they tested and could use for planting.
- Use tested soil to plant appropriate seeds.
Once participants identified whether they had low, high, or neutral pH levels in their soil, they were given a second matching up of soil and seeds appropriate for their pH levels to plant. Using Acid or Alkaline? What pH Means in Gardenspeak by Marion Owen on Plantea.com, pH Preferences on Almanac.com and pH Acid Alkaline Preferences of Plants by Pam Walatka on Lazycompost.com as references, we determined to use tomato seeds for low PH levels and marigold seeds for high or neutral pH levels.
- Greenhouse Demonstration
Using a greenhouse built to the specifics in Greenhouse Project on Education.com, we set it underneath a desk lamp, with a thermometer inside. We noted the temperature on the thermometer before we started the experiment, and for the rest of the program checked it periodically to see if there was any notable change. When setting this up, be sure to place the lamp a safe distance away from the plastic of the greenhouse, for safety reasons, and advise participants to not try this demonstration at home.
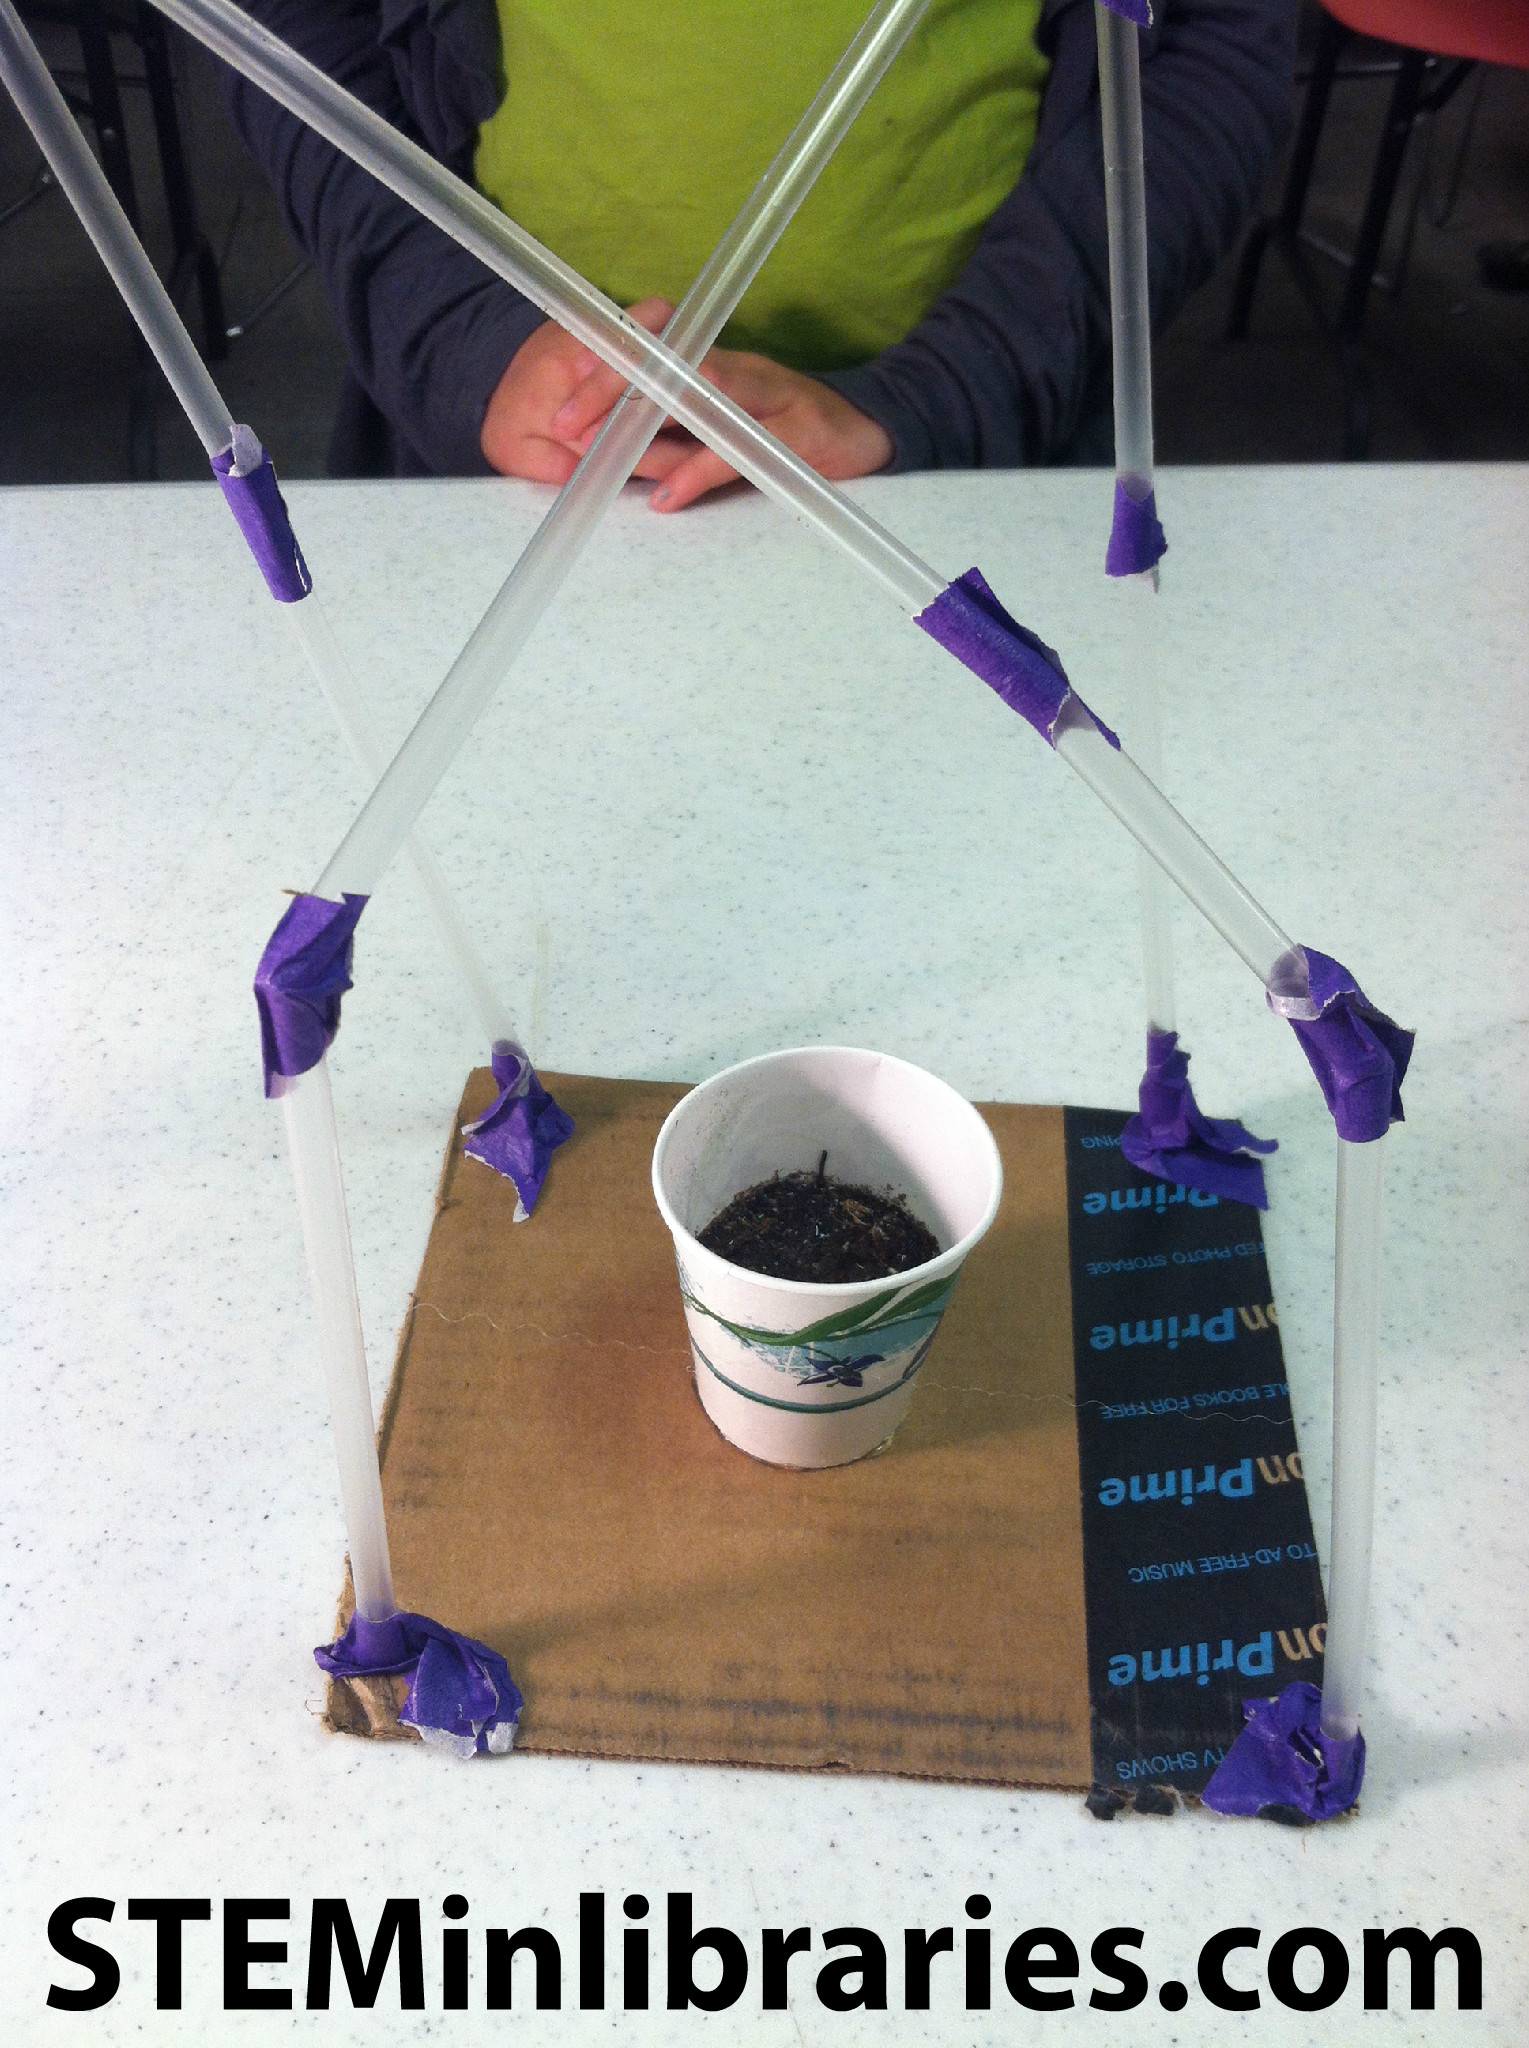
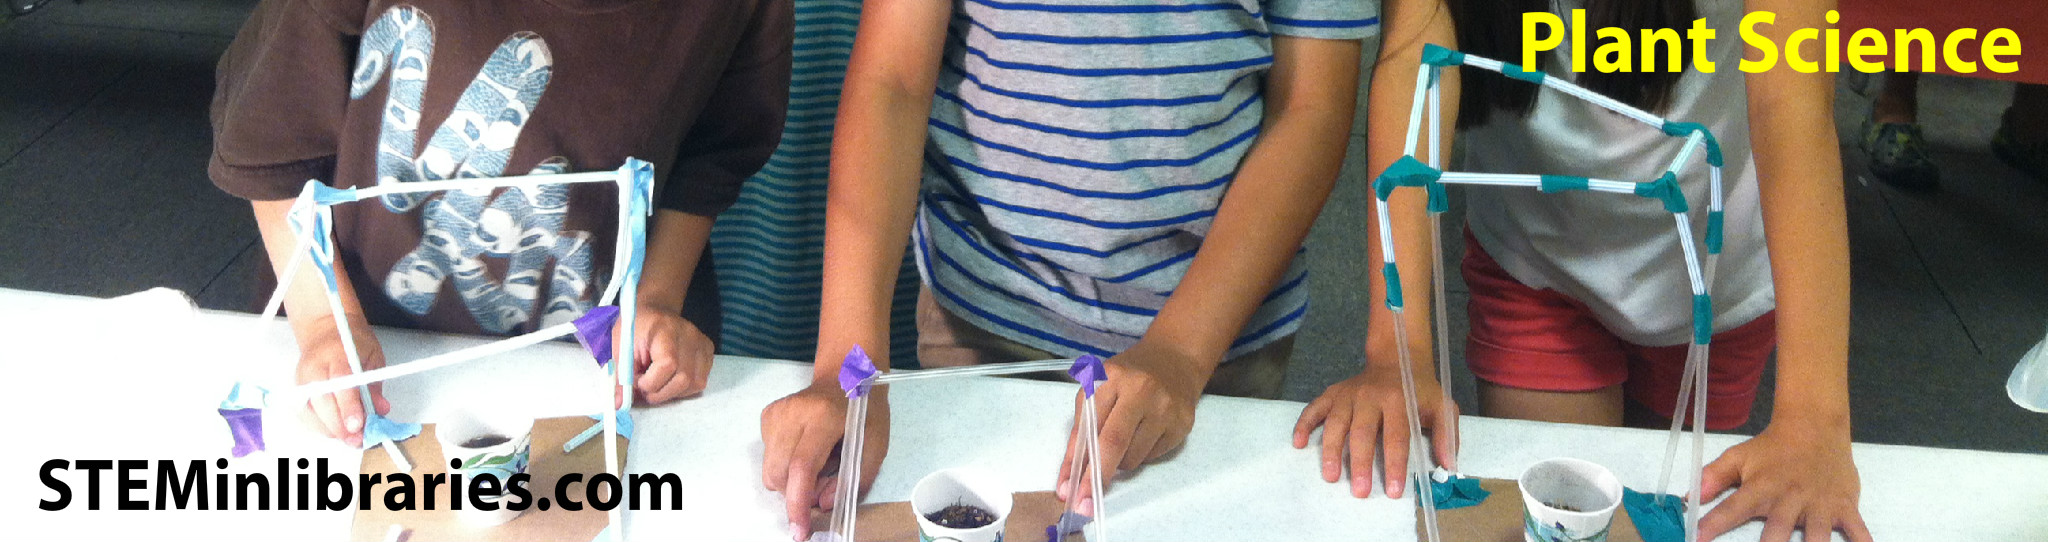
- Building greenhouses.
Using G reenhouse Project on Education.com as inspiration, participants built greenhouses of their own design, and placed their planted seeds from the PH level experiment inside. To help with transporting the greenhouses with their seeds, we helped the participants hot glue their cups inside the greenhouses.
- Optional: Plant cell coloring sheet from Shrinky Dinks Cell Models on Gottoteach.com
If you are in need of something extra to do, this coloring sheet is both fun and educational
Resources Used:
Molecular Expressions’ Plant Cell Structure
Kean University Continuing Education’s Implementing the Science Standards K-4: Plant Life Cycle
Photosynthesis: How Plants Make Food and Energy? on Easyscienceforkids.com
Photosynthesis Experiments for Kids by Kevin Wandrei, Demand Media on SeatlePi.com
Wonder of the Day #262: Can Plants Grow Without Soil? on Wonderopolis.org
Free Farm Lesson Plans: Garden in a Glove on Zweberfarms.com
North Carolina’s Department of Agriculture and Consumer Service’s Kids World’s Soil Testing article
Acid or Alkaline? What pH Means in Gardenspeak by Marion Owen on Plantea.com
pH Acid Alkaline Preferences of Plants by Pam Walatka on Lazycompost.com
Testing Your Soil pH Without a Kit on Preparednessmama.com
Greenhouse Project on Education.com
How Greenhouses Work by Sara Elliott on Howstuffworks.com
Shrinky Dinks Cell Models on Gottoteach.com
What we would do differently:
As noted above in the Photosynthesis experiment, we do not advise placing all the jars filled with torn leaves and rubbing alcohol into one large container for the warm water bath. No matter how shallow we had the water, or how carefully we placed the jars, many of them toppled over and spilled their contents out. If we offered this experiment again- which is extremely interesting and neat looking when successful we would have small bowls for the warm water bath for each individual jar.
Also, for the soil testing experiment, although we purchased two different type of soil, it seems that even our plain topsoil was treated so that it would be balanced. Rather than purchasing soil, we would suggest digging up soil from a few different areas outside to get truly interesting results. We wound up planting a lot of marigold seeds as a result of our selection of soil!
Adaptation for older/younger audience:
The program as planned would be too much for a younger audience, but portions of the program would work well as a standalone programs. The seeds in the glove experiment and greenhouse building would both be fun as individual programs for grades 1-3.
For an older audience, such as teens, the program as planned, perhaps minus the seeds in the glove experiment, would be well received. Our tweens were extremely creative with their greenhouses, and we imagine that teens would be so, too, and would find that particular portion of the program worthwhile.