Week Fourteen: Hands-On Science Museum
3September 24, 2015 by libraryheather
Program Title: Hands-On Science Museum
Target Age Range: Ages 3-8 with a caregiver
Program Length: 3-4 hours (drop-in)
Brief Description: A variety of hands-on STEM activities for early learners and their adult caregivers to do together. These activities can all be set out for a large museum program, or can be brought out individually on a rotating basis as time and space allows in your department as a passive program.

Supplies:
Color Workshop:
-2 pairs of Color Mixing Glasses
-2 Schylling Classic Tin Kaleidoscopes
-12 Sets of Color Paddles
–Lakeshore Color Discovery Tubes
-1 8.5×11″ clear plastic vertical sign holder
–Color Workshop Instructions
Magnetic Art:
-1 17qt. Plastic Stacking Drawer
-3 plastic cereal bowls
-1 plastic cup
–Easy-Grip Safety Tweezers (set of 12)
-4 gallons washable liquid tempera paint
-Assortment of nuts, bolts, springs, screws, etc.
-Either 2 magnet wands stacked together, or a customized square magnet wand (ours is made out of wood with 2 bar magnets glued to the bottom)
-Paper towels
-Water
-1 8.5×11″ clear plastic vertical sign holder
–Magnetic Art Instructions
-Optional: Plastic painter’s dropcloth, a tarp, or other easily washable surface upon which to lay wet paintings while participants explore the rest of the museum.
Magnet Discovery Centers:
–Magnet Discovery Centers (Push & Pull, Flip & Twirl, and Float & Spin)
-1 8.5×11″ clear plastic vertical sign holder
–Magnet Discovery Centers Instructions
Geoboards:
–Geoboard Design Center
-1 extra bag of thin, colored rubber bands
-1 8.5×11″ clear plastic vertical sign holder
–Geoboards Instructions
Build Me:
-1 cardboard privacy partition
-1 set Creative Color Cubes
-1 8.5×11″ clear plastic vertical sign holder
–Build Me Instructions
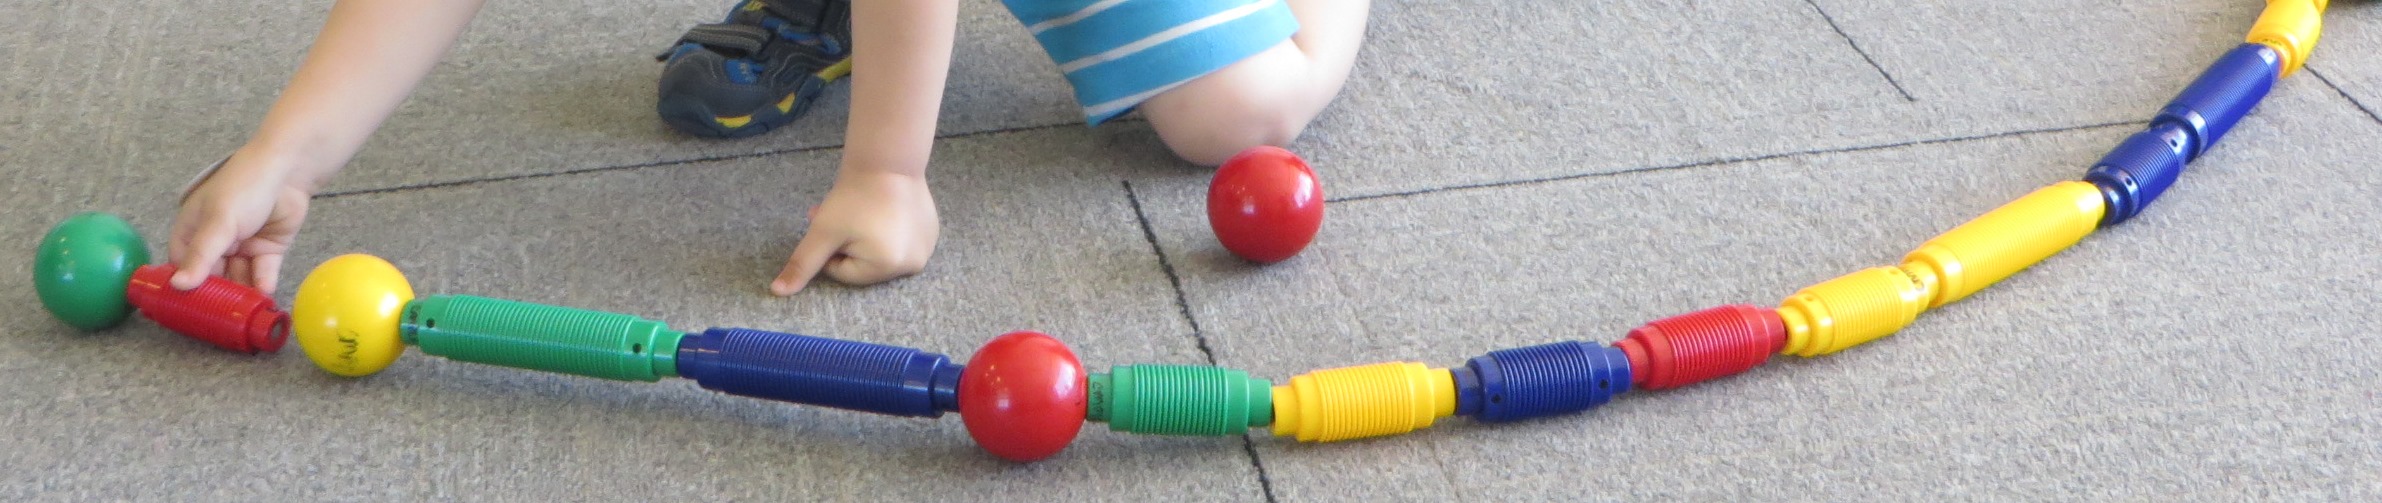
Estimation Station:
-1 set Beads and Pattern Cards
-1 bucket of 500 Link ‘N’ Learn Links
-1 square foil or plastic container for the beads and strings
-1 Large Sand Timer – 1 Minute: Green
–Estimation Sheets
-Pencils
-1 8.5×11″ clear plastic vertical sign holder
–Estimation Station Instructions
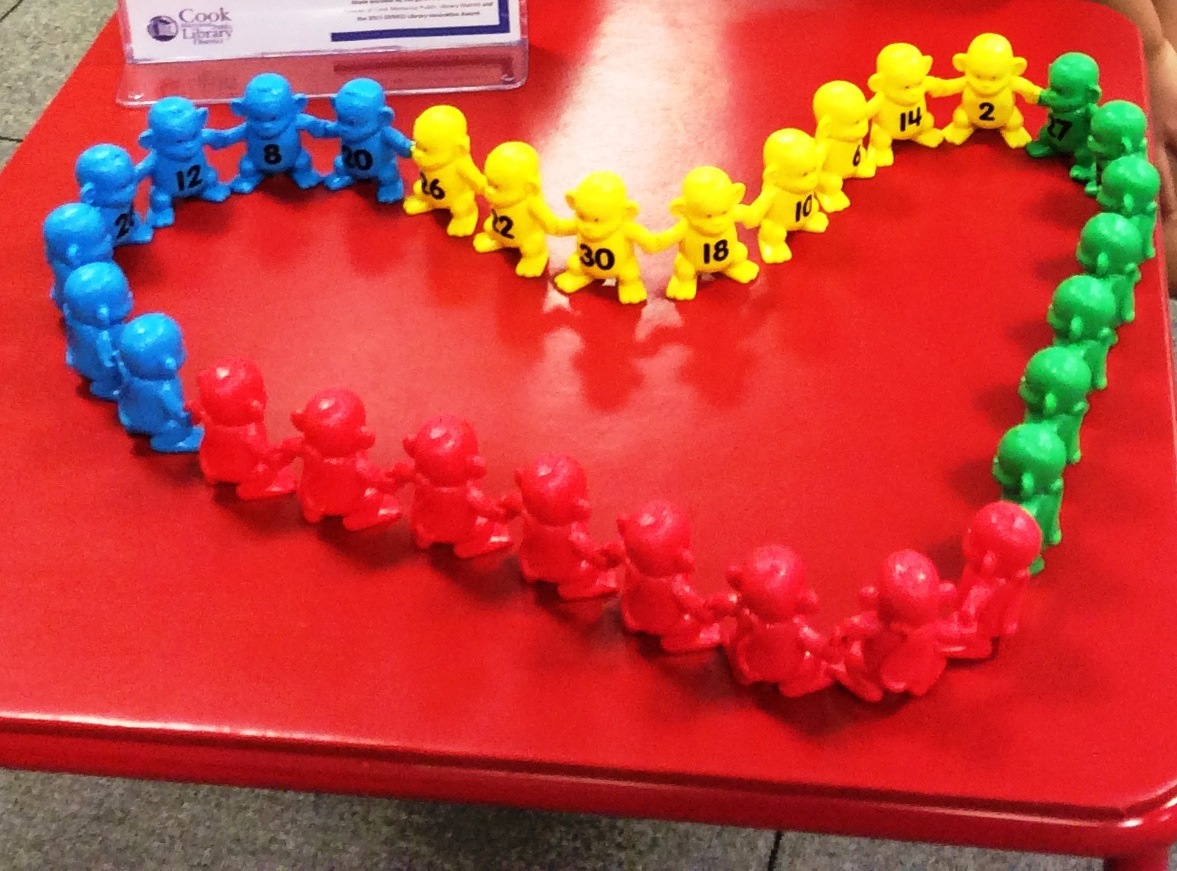
Monkey Business:
-1 set Linking Number Monkeys
-1 8.5×11″ clear plastic vertical sign holder
–Monkey Business Instructions
A Good Balance:
-1 See-Inside Bucket Balance
-1 set Learning Resources Weighted Numbers
-1 set of 54 Hexagram Weights
-1 8.5×11″ clear plastic vertical sign holder
–A Good Balance Instructions
Time to Reflect:
-4 Square Shatterproof Acrylic Safety Mirrors 12×12″
-Black Electrical Tape (to tape 2 mirrors together)
-1 bucket of 250 wooden pattern blocks
-1 8.5×11″ clear plastic vertical sign holder
–Time to Reflect Instructions
Measure Up:
-1 Step-By-Step Measurement Mat
-1 Lakeshore Learn to Measure Center
-1 8.5×11″ clear plastic vertical sign holder
–Measure Up Instructions
Sock Families:
-1 horizontal drying rack
-Multiple pairs of children’s socks (different sizes and colors, including a variety of patterns and shapes on the socks)
-50 wooden clothespins with springs
-1 plastic laundry basket
-1 8.5×11″ clear plastic vertical sign holder
–Sock Families Instructions
Colorful Cup Towers:
-25 6-packs of KALAS Tumblers
-1 8.5×11″ clear plastic vertical sign holder
–Colorful Cup Towers Instructions
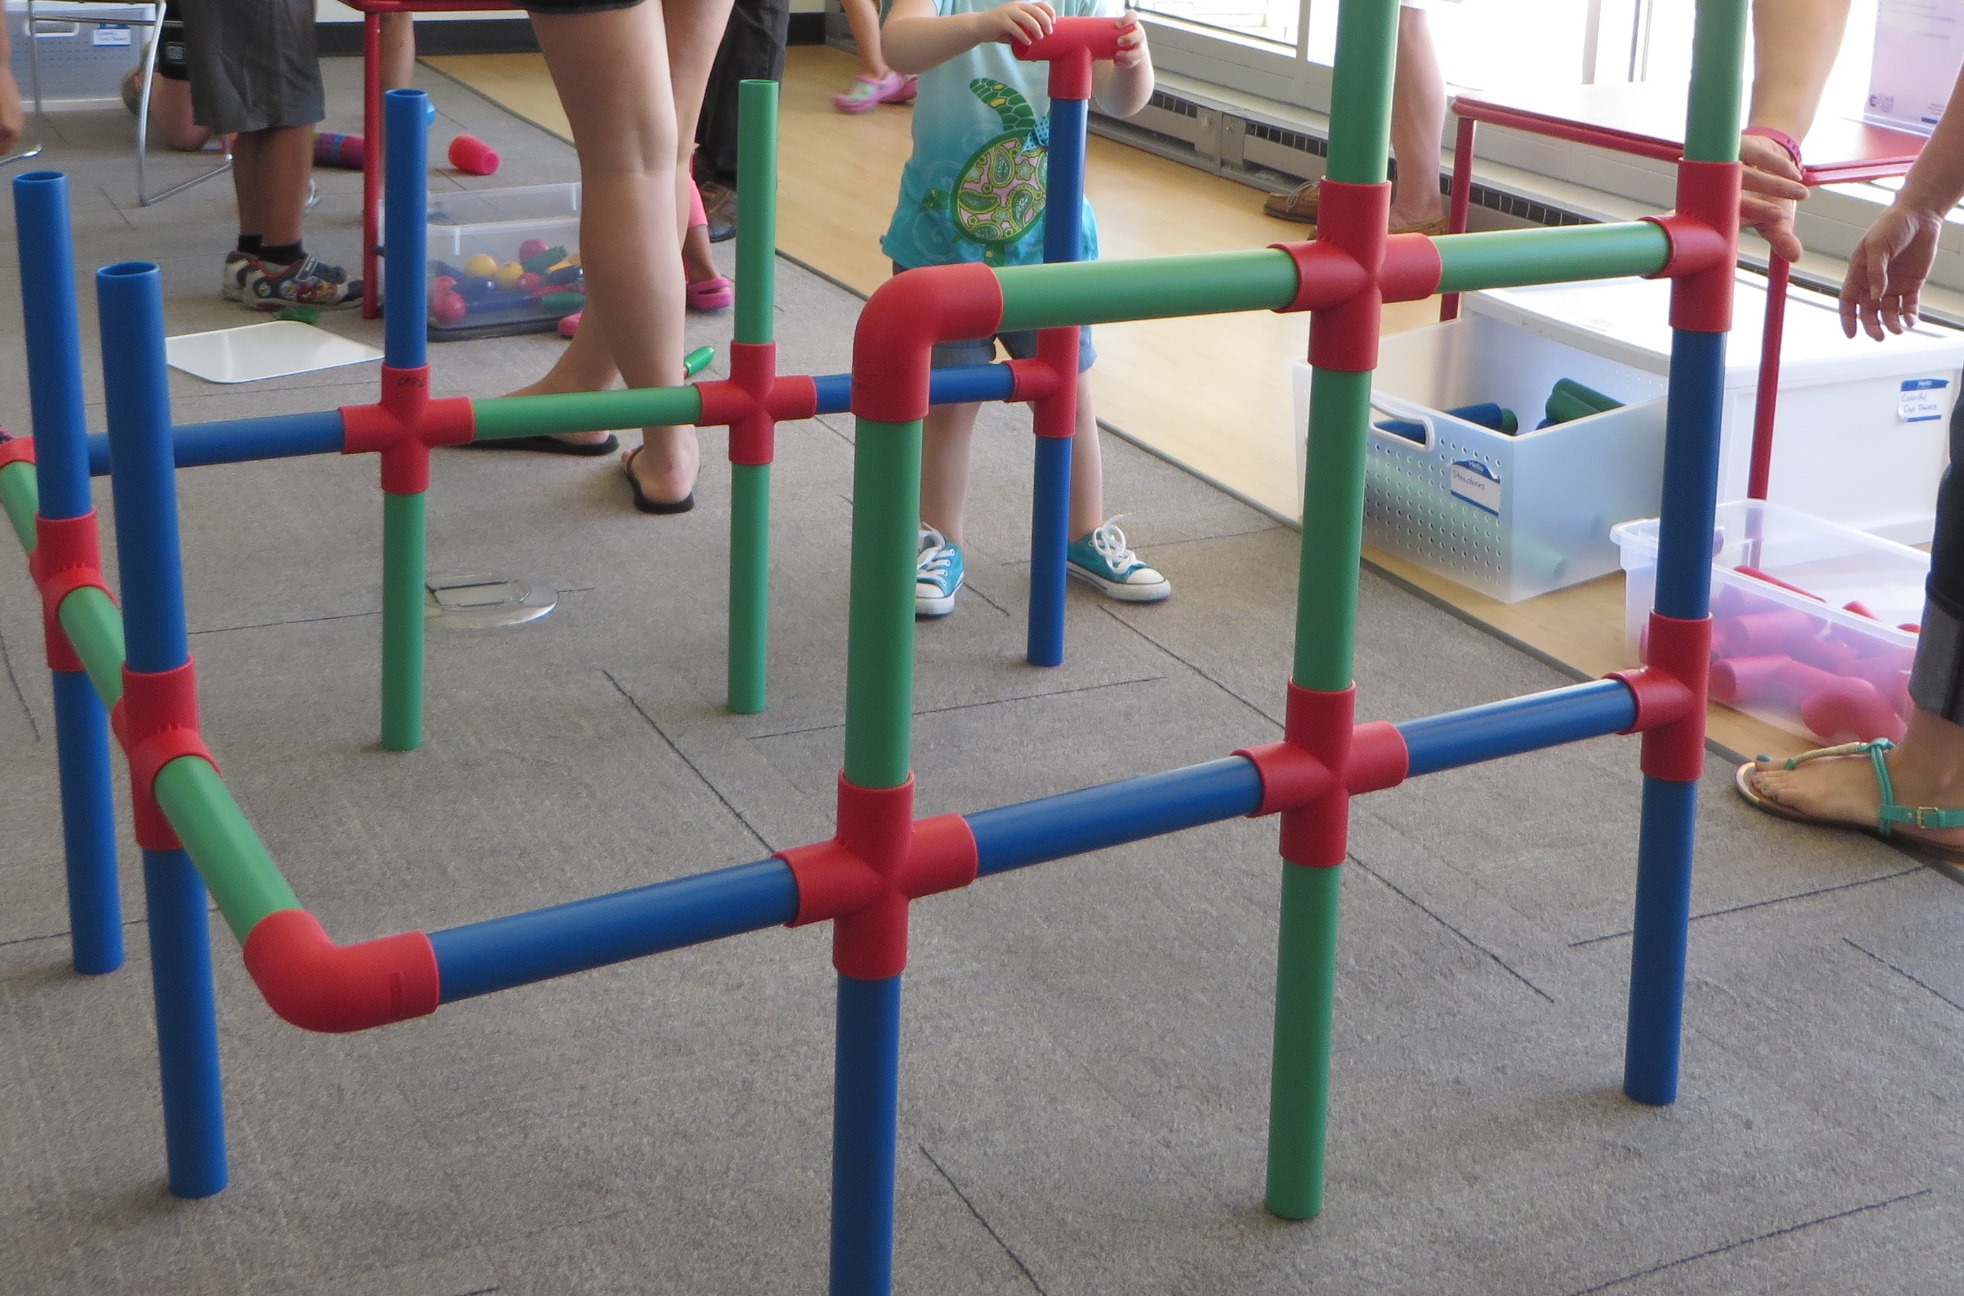
Structures:
-1-2 sets of Giant Pipe Builders (we started with one set, but ended up getting another because it was so popular that there were always more children than available building materials)
-1 8.5×11″ clear plastic vertical sign holder
–Structures Instructions
Magnet Construction:
-1 Magna-Tiles Starter Set
-1 Mega Magnets Construction Set
-1 8.5×11″ clear plastic vertical sign holder
-Instructional Sign
So Magnetic!
-1 Magnet Discovery Board
-Optional: Set of 6 8″ Magnetic Wands (only if you want to include a variety of other magnetic/non-magnetic objects at this station)
-1 8.5×11″ clear plastic vertical sign holder
–So Magnetic Instructions
Bright Light Painting:
-1 Artograph Light Tracer Light Box 10×12″
-1 box Ziploc Double-Zipper Heavy Duty Freezer Bags (216ct)
*Use the gallons of paint from the Painting With Magnets station to fill bags
-1 8.5×11″ clear plastic vertical sign holder
–Bright Light Painting Instructions
Liquid Discovery:
-1 set Lakeshore Liquid Discovery Tubes
-1 8.5×11″ clear plastic vertical sign holder
–Liquid Discovery Instructions
How Many Hexagons?:
-1 bucket of 250 Learning Resources Wooden Pattern Block
-Hexagon Challenge Sheets
-1 8.5×11″ clear plastic vertical sign holder
-2 How Many Hexagons Pattern Sheets
–How Many Hexagons Instructions
Magnetic Gears
-1 set Turn & Learn Magnetic Gears
-1 Stand-Up Magnetic Design Center
*No instructions needed for this station
–Cosco 24×24″ Vinyl Top Table with Screw Legs (as many as you need for the stations)
-Plastic containers to fit the items at each station
-Labels for the containers
Cost: $$$+ ~2,000 (yours could be more or less, depending on what you purchase)

Advanced Preparation:
-Purchase kits.
-Measure the items that will be in each kit and purchase storage containers accordingly.
-If needed, purchase short tables on which to put the kits.
-If you don’t have extras, purchase clear plastic sign holders for each kit.
-Create simple instructional signs for each kit (or print out and prettify ours from the links below if you purchase the same kits).

-Use black electrical tape to attach two square safety mirrors together. Make sure there’s enough slack so that you can fold them together for storage and adjust them easily for the purposes of the station.
-Label each container with the kit name.
-Put instructional signs in their vertical sign holders. Attach choking hazard labels on the signs as applicable.
-Create a welcome sheet with choking hazard warning to be given to each family as they enter the museum. You can give this information verbally in lieu of a welcome sheet.
-Print out and cut up Estimation Sheets to put in the Estimation Station.
-Print out two blank How Many Hexagons Pattern Sheet and laminate them for use in the How Many Hexagons? station.
-Once you have found a museum layout that works for your library, we strongly suggest that you a) photograph each station when it’s all set up, and b) create a schematic that shows where to put each station in the room. Naturally, setting up 18 stations is a bit labor intensive, but it’s much worse when those doing the set up do not know the best place to put the stations, nor the best way to arrange the items in each station. Here is an HOSM Room Set-Up for one of our locations.
Program Outline:
1. Set up each station (if you have 18-19 stations, it’s helpful to give yourself 2 hours to set up).
2. Welcome patrons as they enter, give them a welcome sheet that details how the stations are meant to be used (child and adult together), and to take special note of stations with choking hazard labels on them. You can also do this verbally.
3. Help out and tidy up as needed throughout the program.
4. Give a 15 minute warning and/or start cleaning up stations that are no longer in use toward the end of the program.
5. Clean up and put away stations (though faster than setting up, it’s still helpful to give yourself at least an hour for take-down).

Handouts: None
Instructional Signs:
A Good Balance Instructions
Bright Light Painting Instructions
Build Me Instructions
Color Workshop Instructions
Colorful Cup Towers Instructions
Estimation Station Instructions
Geoboards Instructions
How Many Hexagons Instructions
Liquid Discovery Instructions
Magnet Discovery Centers Instructions
Magnetic Art Instructions
Magnetic Structures Instructions
Measure Up Instructions
Monkey Business Instructions
So Magnetic Instructions
Sock Families Instructions
Structures Instructions
Time to Reflect Instructions
Special Instructions and Procedures:
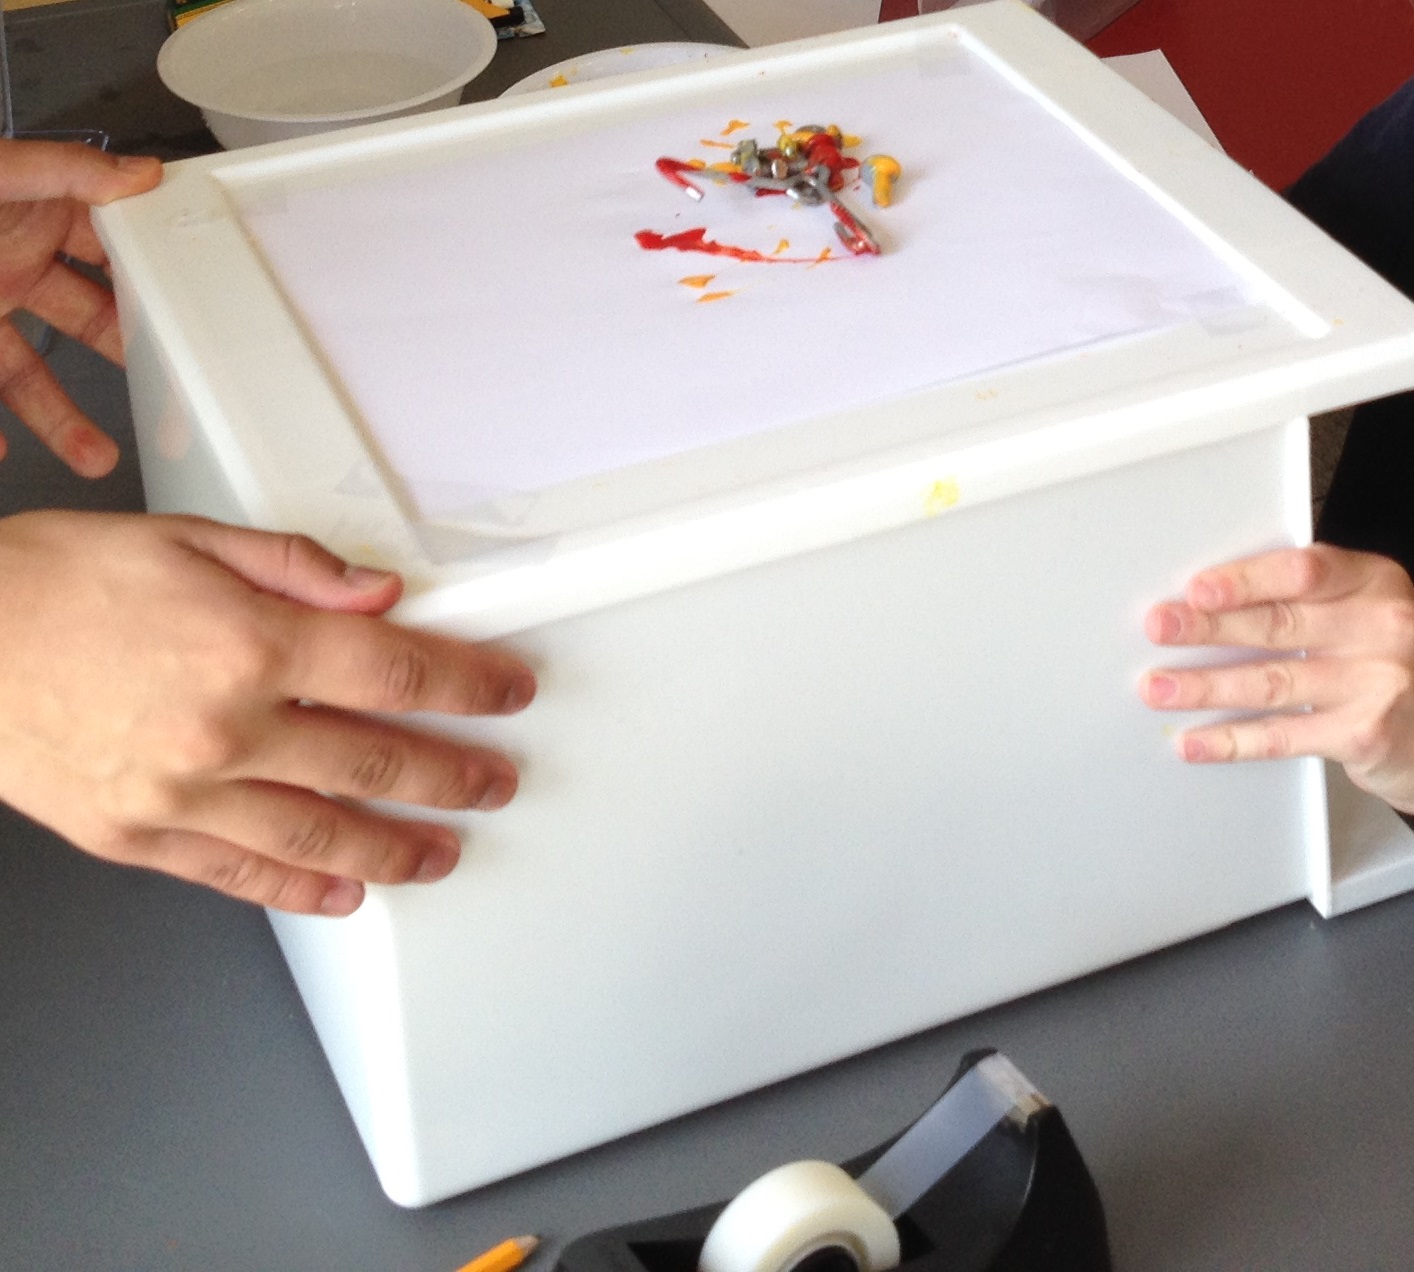 We strongly recommend that if you do Magnetic Art, you a) have the station positioned next to a sink, and b) you have a staff member or volunteer dedicated to running it. We have observed that parents are reluctant to use this station without guidance (perhaps it has too many tricky-looking components?), so it’s helpful to have someone there to encourage them. Additionally, someone has to be there to swap out the paint water, wipe up spills, and keep things generally tidy.
 We suggest putting all of the building materials (Structures, Colorful Cup Towers, and Magnetic Structures) next to each other. Kids love to use these materials in different combinations while building their structures!
We arrange our stations so that the non-choking hazard tables are closer to the entrance, mostly on one side of the room. We purposely put the stations with more significant choking hazards on the opposite side of the room from the entrance. The  short tables are arranged around the edges of the room. In the middle of the room, we put two regular rectangular tables together with chairs around the outside–this is where we put the Geoboards, Time to Reflect, and How Many Hexagons stations. We put those at higher tables partly because of the choking hazards and partly because it’s easier to sit down to do them, but also because older children and adults really enjoy these activities as well.
Finally, be sure to have a stack of chairs on hand! Though the setup works well for active 3-8 year olds, many come with grandparents who greatly appreciate a place to sit down.
Resources Used:
The ideas for nearly all of these stations came from the DuPage Children’s Museum. They came to do a presentation for a LACONI YSS program, in which they set up several stations around the room and let us play. They encouraged us to take these ideas into our libraries–and we did! Thank you, DuPage Children’s Museum, for inspiring such a great ongoing program for the families in our communities!


[…] presenters. If you have any hands-on science activities for the kids (such as those listed in our Hands-On Science Museum post, coloring sheets, etc), those will be needed […]
[…] Learning and many sets of these colorful stackable tumblers from Ikea as part of our “Hands-On Science Museum.” Kids love to use these two building items together, so we put them all out at one station […]
[…] to this post from Knowledge Matters. We used 2 sets of Giant Pipe Builders that we own for our Hands-On Science Museum to create a much smaller version of their “Sound Garden.” But, like them, we used twine […]